|
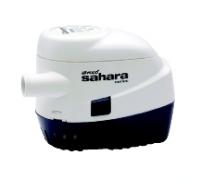
Attwood Sahara S750 Automatic Bilge Pump
|
I picked this pump based on users recommendations. From the Attwood website:
Sahara Bilge Pumps include 36" lengths of 16-gauge tinned copper wire. Wire is caulked to prevent water from wicking through insulation jacket. All materials and components are state-of-the-art. Permanent-magnet motor, stainless steel shaft, and steel-reinforced seal ensure powerful, durable performance.
Backed by Attwood's 3-Year Warranty!
S750 is sized for larger recreational boats. Our most powerful 3/4"-outlet automatic pump! 750 GPH at open flow, 625 GPH at 3.3' head. 3/4" hose outlet.
|
|
|
This bilge pump wire is heavy duty marine quality tinned 14 awg wire, with the jacket molded around the three inner wires instead of just slipping three wires into a plastic jacket. The red wire is connected to the battery with a 5 amp fuse and carries power to the dashboard switch. The brown and black wires carry the power back to power the pump. Depending on the switch position, either the black or brown wire is powered.
|

Bilge Pump Wire
|
|

Wiring Diagram
|
Basic wiring diagram for the an automatic bilge pump. Note that the bilge pump is on a circuit all its own so that no other accessory can accidentally trip the fuse leaving the pump useless.
|
|
|
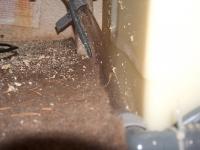
The bilge in the Capri 1600 is a little different than most boats because the space for the fuel tank is recessed into the bilge about two inches. So the pump is mounted in front. A small piece of pressure treated 1/2" plywood was epoxied to the keel of the boat and then the pump base is screwed onto the plywood.
|
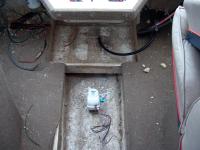
Pump Mounted in Bilge
|
|
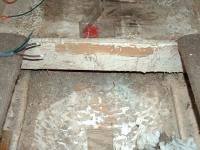
Mark and Drill
|
The bilge hose has to pass through this bulk head, so its been marked to be drilled.
|
|
|
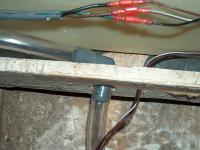
The water exits the pump, goes through the bulkhead and two 90* elbows feed the hose back to the transom. The grey wire harness is the bilge wire with two power connections, (manual on and automatic on) and a ground. The connections are sealed with marine grade sealer. The wires will be tucked down by the hose out of sight and protected.
|

Plumbed and Wired
|
|
Closer View
|
The 90* connection in front of the tank can be seen clearly here.
|
|
|
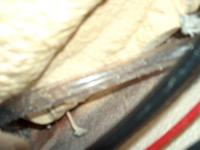
The elbow at the bottom front of the photo is fastened with PVC pipe strap, same back by the transom where the hose curves up. There is about 1 inch clearance on the side of the tank to tuck in the hose. Had to cut some foam out of transom cap to get clearance for the hose. Little bits of shredded foam stick to everything.
|
Hose on side of Fuel Tank
|
|

Stainless Steel Through Hull
|
Chose Stainless Steel for the through hull fitting. Could have used plastic or brass, but plastic breaks from impact with the dock, and brass turns green. Stainless will remain corrosion free and keep its shine. Also, this Attwood brand fitting has a groove cut on the backside of the outside flange to help hold the sealant and keeps it all from squishing out when tightened. Little things make a big difference when putting a hole in your boat.
|
|
|
Drilled a 1 inch hole just under the rub rail to install the thru-hull fitting. Used Boatlife marine caulk to seal it.
|

Thru-Hull
|
|
Inside Transom Cap
|
This photo is taken looking straight up into the bottom of the transom cap. The hose connects to the thru-hull fitting on the left, and makes an uphill loop then down to the bilge pump. Just shows how tight things are in there. Very difficult area to work in. I had to make the thru-hull connection blind, just felt around and made the connection.
|
|
|
A 3 position switch (on-off-on) is needed for an automatic bilge pump. One "ON" position is for full automatic operation where the pump cycles on and off by the float switch. The other "ON" is manual override to automatic operation and the pump will run. The "OFF" setting will override automatic operation and the pump cannot run. Its the top switch of the three toggle switches.
|
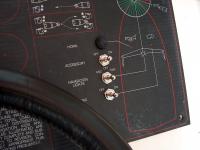
Add Bilge Switch
|
|