|
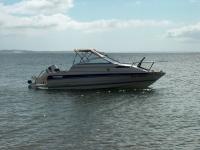
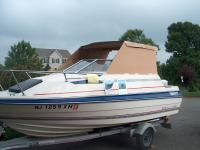
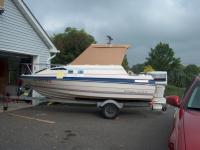
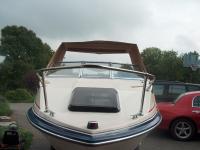
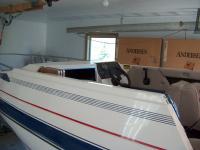
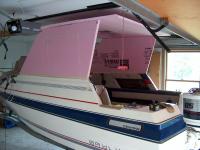
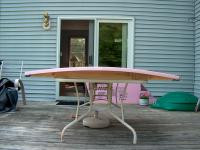
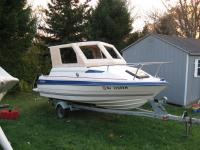
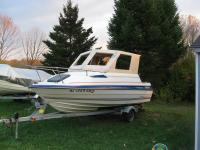
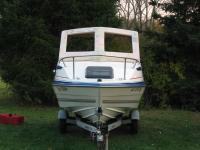
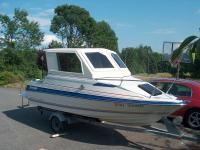
1985 Bayliner 1600 Capri Cuddy with Navy Top.
|
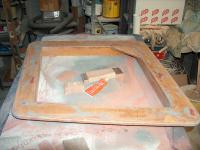
This is the boat as originally outfitted by Bayliner. I really like it and we used it this summer to get a feel for if I should make a hard top or not. I realized a hard top with steeper incline windshield and higher top will give more usable space inside and more protection from the elements than the factory Navy Top.
|
|
|
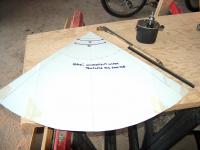
First step was to do a photo mock up of my idea to see what it would look like on paper. This photo was changed using MS Paint!
|

Hard Top Concept
|
|
Aft View
|
Also made this aft view. I like it so much, I decide to go ahead with the next step of the project. A physical mock up.
|
|
|
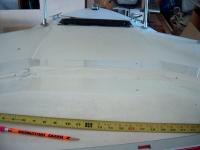
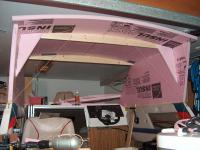
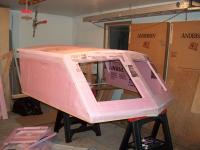
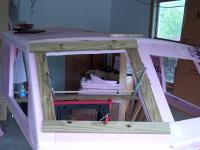
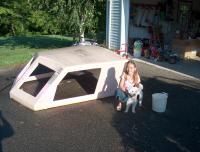
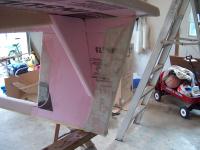
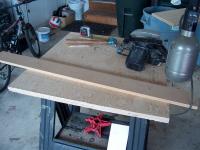
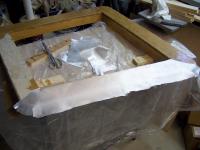
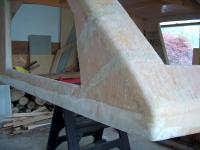
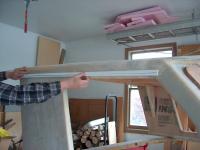
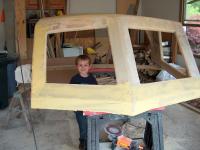
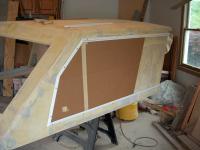
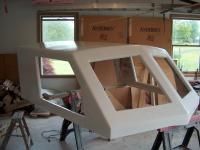
Took about 4 hours on a Saturday afternoon to measure, cut and assemble this simple cardboard mock up. But it does give a much better impression of what the finished product will look like.
|
Cardboard Mock Up.
|
|
|
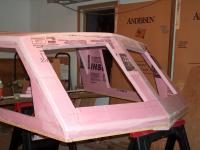
One of the advantages of a cardboard mock up is getting to sit inside and see and feel the actual dimensions. I made the top 3" higher than the photo mock ups, and my head still just rubs the top. By lowering the floor between the stringers 3 inches, there will be full headroom for my 5'8" height.
|
|
|
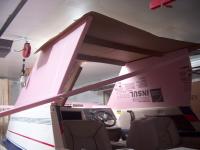
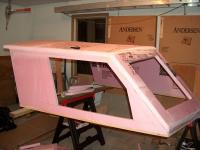
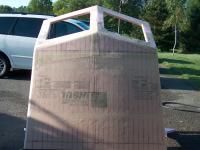
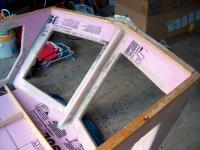
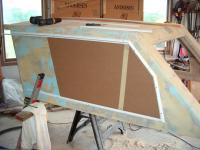
I didn't do the windshield frame, but I did make the V shape on the top to mach the windshield angle. At this point I am happy with the look and feel.
|
|
|
|
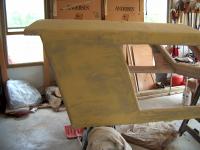
Another view. When compared to the photo mock up, the card board version is taller. It also does not have the V shaped windshield on it, and that will give it a longer appearance.
|
|
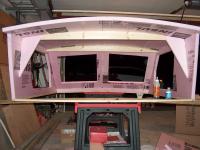
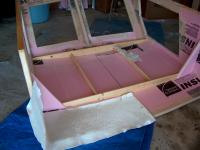
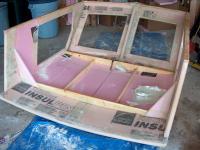
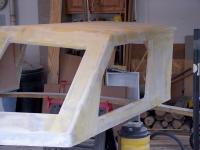
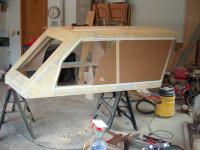
Front view. The sides are slopped in a little bit to match the curve of the boat.
Next step is to go buy the foam panels and start fabrication!
|
|
|
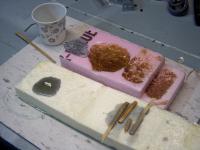
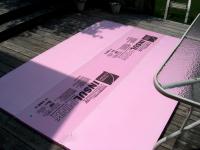
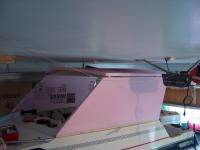
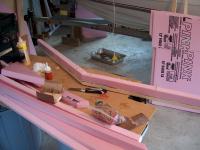
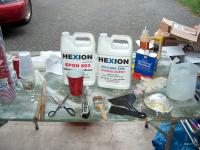
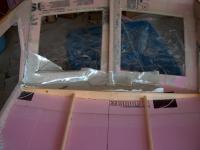
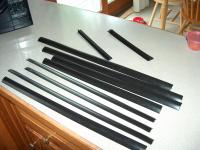
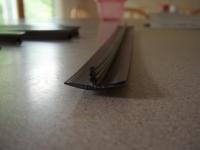
Foam Tests
|
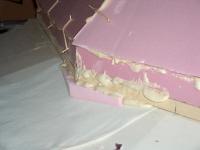
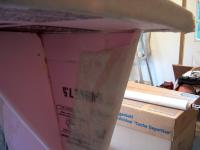
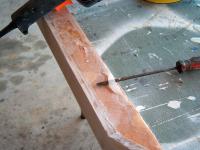
Tested polyester resin on the common pink rigid styrene foam and also polyisocyanurate foam. Both available at the home centers. Polyester resin melts styrene foam, but not polyisocyanurate foam. Polyisocyanurate foam is what surf boards and boats are made from. The difference between what I tested from the home center and what you buy for surf boards is the density. Surfboards are typically about 5lbs density foam, the stuff from the home center is 1 or 2 lbs. A huge difference in price too. Using the 1" thick home center version will cost about $60, the 5lbs stuff about $400 plus. We'll see how well it works.
I tried pealing off the cured resin from the foam, and it pulled the foam apart, so the resin does adhear, the foam is just not very strong.
|
|
|
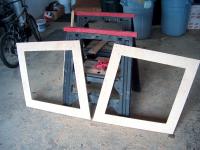
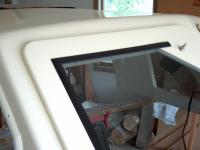
Removed the windshield and side glass. It came off easy with about a dozen or so screws. I put two layers of cardboard in the cuddy and stored the windshield there for safe keeping. Then took more measurements, this time more exact and updated my sketches.
|
Off with the old Windshield
|
|
Find Center
|
With the windshield off, I was able to lay out how the two windshield panels will sit on the dash. Hard to see in the photo, but there are pencil lines that intersect in the middle of the boat at a 34* angle. This is the center line of the boat, but the boat is not entirely symmetrical. The port side is 1/2 wider than starboard measuring from the center line. The hard top will have two windows in the windshield where the original windshield had three.
|
|
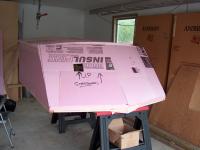
After cutting up some 1/4" plywood and having problems, I decided to use Styrofoam and epoxy. Had to glue up two pieces to get the size needed to cut the side walls out of. Using special Styrofoam construction adhesive available at the home centers. Stuff takes forever to dry. Put some weight on the seam while it cures, and to keep it from blowing away.
|

Styrofoam glue up
|
|
Trial Fitting
|
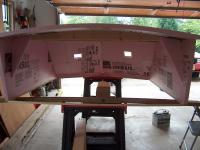
Cut both side panels and threw on the cardboard top for a trial fit. Glad I did because I had the sides tilted in too much. Going with less of an angle.
This is about as much as I got done before putting the boat away for the winter.
|
|
|
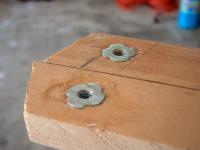
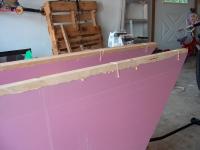
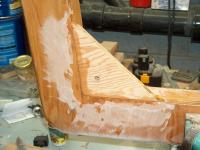
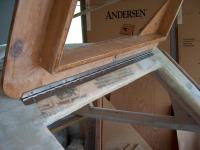
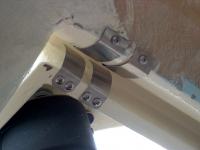
Spring has come and work is continuing on the project. The top will be removable. To do that and be able to attach it well, the bottom perimeter of the top will be 3/4" fir. Bolts will come up from under the gunnels and into the wood where T-nuts are epoxied in place.
|
Attachment Support
|
|
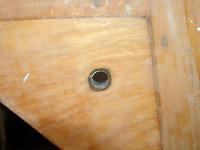
T-nuts Epoxied In Place
|
The port and starboard boards have the T-nuts epoxied in so that they can't come loose later on. The same treatment is given to the wood supports under the windshield. A total of 10 bolts will hold the top on the boat.
|
|
|
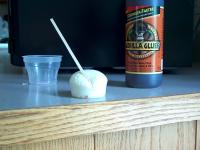
I was having trouble finding a good glue to attach the foam panels together, or attach anything to the foam panels. Then I gave Gorill Glue a try. Gorilla glue works very well. Here the wood base supports are glued to the foam side panels with gorilla glue. The glue expands when activated with water and squeezes out the sides. But it holds really well.
|
Gorilla Glue to the Rescue!
|
|
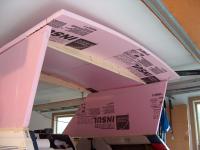
Making the Roof Panel
|
The roof panel required gluing up three foam panels to get a piece large enough to cut the roof out of.
|
|
|
It was a hot day, so I brought the glued up panel into the house to measure, mark and cut it. My wife is the best! She doesn't complain about me doing this stuff as long as I clean up when I'm done.
|
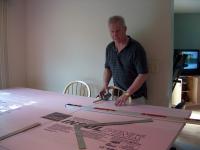
Cutting the Roof
|
|

Roof in place
|
The roof panel was cut and is just resting in place for a trial fitting.
|
|
|
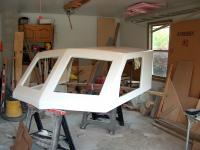
Top is looking a little tall. Don't think I like the way it looks being tall.
|
Aft View
|
|
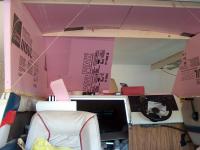
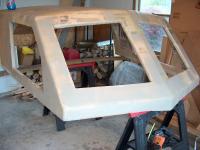
Interior of Cabin
|
One good thing about trial fittings; you learn if it works for you or not. In this case I learned that the roof panel needs more reinforcement than I anticipated. So to give it more strength and to not rob head room, I decided to bow the roof.
|
|
|
Using a 4 ft level, I drew lines spaced the width of the level (about 3 inches). Then using the razor knife, jut 1/2" deep scores down the lines. This made the roof panel more flexable and easy to bow without having to fight it.
|
Mark Roof Panel to Bow
|
|
Roof Supports
|
Cut these roof supports out of 1x4" and ran a 3/8 radius bit in a router over them to remove the sharp corner. This will make it easier for the fiber glass to lay over the supports. 'Glass does not like to make sharp bends.
|
|
|
My Daughter Amber is a often my helper on projects. Here you can see the duct tape used to attach the roof supports while fitting the top to determine the best location for the supports.
|

My Helper
|
|
Head on View of Bowed Roof
|
Front view of bowed roof panel.
|
|
|
The roof is resting in place. I realized that the bow in the roof gave 3" extra headroom. The whole top was getting rather tall, so I cut 3" off the side panels. That returned the headroom back to what it was, and makes the top look lower and sleeker.
|
Bowed Roof on Top
|
|
Aft View
|
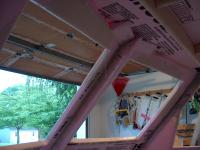
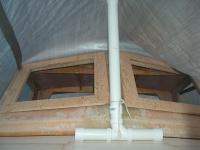
The roof supports can be seen here. The space between them is where clear headroom is needed for standing. There is about 5'9" of headroom. 6'3 if you include the possibility of lowering the floor to bilge level.
|
|
|
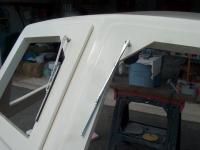
Two tension lines keep the top square while the front windshield panels are cut and fit. Making them run from the roof support to the sides rather than diagonal across the boat leaves the cabin open for me to walk in and out.
|
Keeping it Square
|
|
Base of Windshield Windows.
|
The base of the windshield is made the same as the side panels. Wood base with T-nuts epoxied in place, then 1 1/2" vertical foam section.
|
|
|
The port window panel is in place.
|
Window Panel in place
|
|
Leading edge of Windshield
|
A good view of the leading edge of the windshield. One more windshield panel to make, then the whole top can be glued together and removed as one piece to cut windows and start sanding and shaping.
|
|
|
Opened a can of Great Stuff home expanding foam sealer. It did glue the styrofoam together, but stayed soft and not as strong as the Gorilla glue. So I won't be using this to fill gaps on the top.
|

Great Stuff Test
|
|
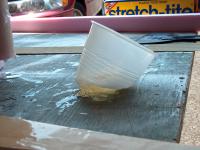
Testing Gorilla Glue
|
I knew from gluing panels together with Gorilla Glue that it foams up and cures very hard. So I wanted to see just how much I could get it to foam up so it would fill gaps where the panels meet. I mixed about a teaspoon full with 3 drops water in the plastic jello cup. After 15 minutes, it had expanded to what you see in the picture. It still cured very firm, much harder than Great Stuff. So when I glue up all the top panels, I'll mix some water in with the glue so it will fully expand and fill any gaps. It pays to test!
|
|
|
Trimmed the roof to the right width and glued on the roof supports, then glued the roof panel to the side panels. Angle braces were added to the rear in line with the roof brace for lateral support. These angle brackets are about 8" wide and 16" tall.
|
Glue, glue, and more glue....
|
|

Windshield panels are in!
|
Been about two weeks since I was able to work on the top. Finally had some time to work on the boat today. Got the windshield panels glued in.
|
|
|
Used a lot of glue on the windshield panels. So some rubber bands stretched around tooth picks were needed to hold things in place. Otherwise the expanding glue could push panels apart.
|

Panels held with rubber bands
|
|
Fill the gap
|
There was a small gap in the front of the top. Cut a piece of foam and glued it in. It will be cut flush with the wood base.
|
|
|
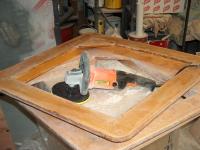
Took the top off the boat and put the boat outside. Now its time to start sanding and cutting.
|
Top is off boat
|
|
Rear view of stand
|
|
|
|
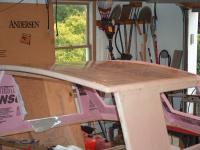
Needs sanding and trimming off excess glue.
|

Top in the rough.
|
|
Cut out Windshield
|
Spent some time cutting the windshield openings. Started a bit smaller, then got inside and checked out the view. It was too small, so I cut another 2" off the center side of the windows, then two inches off the top, and one inch off the outside sides. Now they are big and the view is much better. Corners are rounded off and glue cleaned up.
|
|
|
The side windows I made a little shorter in length than originally planned. I also cut off the sharp leading edge, because it wasn't really of any practical use, although it looked nice. Cutting it short makes the opening larger quicker when sliding the window to the rear. Plus there is more support under the windshield outer edge.
|
Cut out Side Windows
|
|

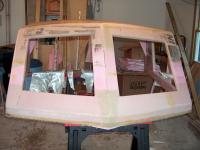
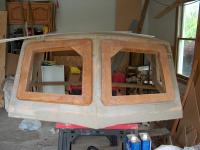
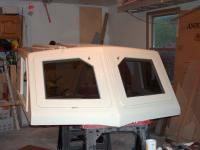
All openings cut
|
All windows cut. Both the front two and side two windows are exactly the same size, even though the top is not 100% symmetrical. That way when I have the glass cut, the shop will only have to cut two size windows, not four.
|
|
|
Aft View
|
Aft View
|
|

More interior
|
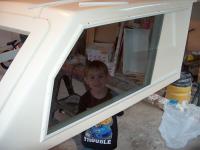
Its looking like there will be a good view from the inside
|
|
|
The top is looking and feeling light and airy. Not at all closed in. I like the fact that I have a good field of vision from inside.
|
Feels airy
|
|
Window Frames
|
The windshield windows need to be in frames. Started with 1x4 pressure treated pine. Ripped down to 1x3, then cut to frame the window opening.
|
|
|
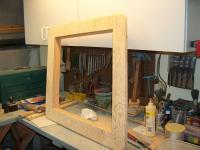
Here are the finished frames. Ran in to so many problems. First, could not get the latches I needed to seal them closed. Second, they are way heavier than expected, and third, I don't like the looks of them. So they are now in the recycle bin. Decided to go with windshield that will not open for simplicity.
|

Finished windshield frames
|
|
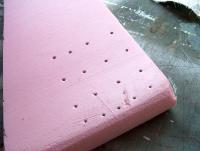
Grip holes
|
Before applying the fiberglass, holes were punched into the foam about every 1-2 inches. Hopefully this will allow the epoxy to get a better grip and not delaminate. When the first coat of epoxy was squeegeed on, I forced it into the holes.
|
|
|
This is a test of the fiberglass and epoxy I ordered. Its a piece of 1708 biaxial. That means a 17oz weave at 45* with an 8 oz mat behind it. Rather heavy stuff, about 1.5 lbs per square yard. But this test showed it is very tough stuff, I hammered it , poked it, and eventually stuck a 1/4 screwdriver through it, but that was hard. When I started tearing it apart, I found the puncture holes had epoxy in them from 1/4 to 3/8 in deep.
|

Fiberglass test
|
|
Resin.
|
Wow. Resin gets hot as it hardens, so hot it melted the plastic cup the unused portion was in.
I'm using marine epoxy resin and fiberglass products from fiberglasssite.com
|
|
|
This is about as straight as I could get the corner of the top.
|

More sanding
|
|

Removed the Dip in Roof
|
Worked the roof a bit to get the dip out. This is as good as I'm willing to work it. Anything more will be fairing compound after glassing.
|
|
|
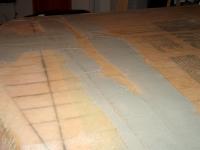
This is one piece of 1708 biax, 10ft x 50 wide. Does most of the roof and sides. Wrapped some around all openings and rear side panels for extra strength. This one layer has made the top incredibly strong.
|
Fiberglassing started
|
|
Ooops!
|
This section of 1708 glass wraps around the starboard side of the top. It looks cloudy because I waited too long and the resin started to thicken and harden. Thick resin will not saturate the glass, and the result is only a partial connection to the foam. Not a big problem here, but something to be aware of going forward.
|
|
|
The corner where the roof meets the side came out fairly good. Had some trouble with saturating the glass on vertical surfaces, but it came out good.
|

Port Side
|
|
Starbard Side
|
This side came out a bit nicer.
|
|
|
Finished covering the entire roof area, and also the lower windshield area. Just have to fill in the gap between top and bottom.
|
Working on the Front
|
|
Fillits
|
Used micro glass spheres to thicken the resin to putty consistency. Made fillets along the windshield support. Planned to do this everywhere on the inside, but after doing this, I realized it is just too much work. The glass went on smooth and fit to the corners well without the fillets.
|
|
|
This is the simple work bench I use to mix the epoxy.
|
Epoxy Work Bench
|
|
Cabosil
|
Left over putty mix after it started to harden and I wasn't ready to stop working....
|
|
|
My Daughter and Daisy the dog are helping wash the blush off the top before starting today's work. The amine blush comes off very easy, just a little dish detergent and a soft scrub brush is used to rub the top, then a blast from the garden hose and it dries clean and wax free.
|
Washing off the Anime Blush
|
|
Finished the roof
|
Here the top is standing on end. You can see the overlap of the glass. It will take a bit of fairing compound to eliminate the seams where there are overlaps.
|
|
|
|
|
|

View from Below
|
Was cutting out the excess foam that squeezed out from the joints where boards meet foam, or foam meets foam. Just wanted to get a nice clean corner for the 6 oz glass to fit into.
|
|
|
The rib added to the center section of the windshield is covered with a wide piece of 1708 glass. The result is the front of the top is incredibly tough.
|
Upside down view
|
|

Keep disposable brush soft in Alcohol
|
I found that by just soaking a disposable brush in a cup with 2" denatured alcohol, it will keep working for a long time.
|
|
|
I'm using the 1708 biax top and bottom on the rearward most part of the top. It's so much easier to fit the cloth in, mark with a Sharpie marker, cut and trim and make the corner cuts for overlap. That way, after soaking the cloth with resin, its easy to put back in exact location.
|
Dry fit Fiberglass Cloth
|
|
Working on the cabin interior
|
the interior is much harder to glass than the exterior due to the more complex shapes and supports inside.
|
|
|
This area on both sides were made from a few pieces that overlap. Used a 40 grit disk to remove some of the high areas where they overlap prior to applying fairing. Needs more grinding...
|

Working the glass...
|
|
Prefitting glass
|
Pre-fitting more fiberglass. The 1708 molds to the contours of the top well.
|
|
|
Moved the top outdoors to sand to keep the glass dust down in the garage, plus it won't get tracked into the house.
|

Setup for Sanding outdoors
|
|
Ceiling is glassed in.
|
The ceiling between the front and rear cross supports is glass in using 6oz cloth. It looks clear for the most part. Some blotchy areas are because there is not enough resin on top, not from air underneath.
|
|
|
Some areas have two and three layers of the 1708 overlapping. The high spots were sanded smooth in prep for fairing compound.
|
Sanded high spots
|
|
Side Window Corner
|
It is hard to sand in the corners with the little 5" disk, like this window corner. Will have to finish with the 7" and add a little mat and sand again before fairing.
|
|
|
The wood strip at the base is wrapped in a 6" wide piece of 6oz glass. After the amine blush was washed off, it looks like there is not enough resin on the top of the cloth. The cloth has resin under and inside, but the top side is looking a little dry. Will have to brush on a coat of epoxy to seal it well.
|

Problem area
|
|
Another problem area
|
This is a closeup of the 1708 biax on the side. The weave in the glass has come to the surface. I think rolling on a layer of epoxy will smooth it over so sanding will not expose the glass.
|
|
|
Here is a photo of where the diagonal brace meets the roof bow support. Also, the rear section of the roof is covered with 1708, where the section forward of the brace is covered in 6oz.
|
Inside Rear Diagonal brace
|
|
Fit the top
|
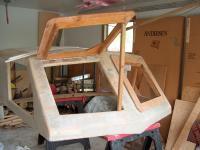
This past week there was a freak snow storm that ripped the tarp that was covering the boat. The top was stored in the garage. Today I was drying up the boat and decided to test fit the top seeing as the tarp was off. Even though it's not painted yet or glass installed, I think it looks great!
|
|
|
Port side view
|
Port side view
|
|
Front View
|
Front View
|
|
|
Rear view
|

Rear
|
|

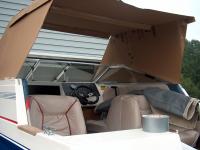
Interior
|
Interior
|
|
|
Helm
|

Helm
|
|

Another View
|
Another View
|
|
This is where the three panel front deck meets a two panel windshield. A small "beak" protruded from the top to keep a smooth mating surface between the top and boat.
Put the boat away for the winter.
|
Front detail
|
|
Working on Windshields
|
Late winter and still too cold outside to work with epoxy and fairing, so I'm turning my attention to the window frames.
This is "take two" with the windshields. I want them to open, so this time the frames are being made from plywood. Bought some 5/8" CDX PST (Plugged Sanded and Touched). Its like regular CDX in that it has exterior glue, but it has all voids filled and is sanded on one side.
Here two pieces have been cut to rough size, and nailed together. This way, the cuts only are done once, and two identical frames are made. The pattern is drawn on the top. A piece of particle board is tacked to the ply to be used as a guide for the circular saw so the cuts are nice and straight.
|
|
|
The center was removed by making plunge cuts with the circular saw. Again, the particle board strip is tacked down as a guide.
|

Cutting out the center
|
|
Hand Saw Cuts
|
The circular saw can't get all the way into the corners, so a hand saw is used to make the final cuts.
|
|
|
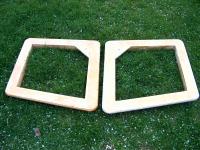
The center is removed and two identical frames are separated.
|
Two Frames
|
|
Fitting to Top
|
Checking the fit from inside and out. The boat is still under a cover with the PVC pipe making a tent to keep the snow off. But I'm still able to get under and work.
|
|
|
There will be a wiper on each windshield. This template shows a 80 and 90 sweep because the motor has adjustable sweep, and also self park feature that is reversible. The template helped me decide where to put the wipers. Right now the plan is to mount them in the center top corners of the windows. The chrome looking pieces on the motor are stainless steel and so is the wiper arm.
|
Windshield Wipers
|
|

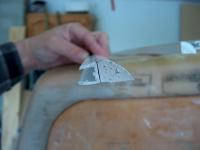
Rounded the Corners
|
Put a two inch radius on the corners of the frames, then rounded over the edges with a 1/2" rounding bit in a router.
|
|
|
Supports framing the glass area are glued on with waterproof wood glue.
|
Outside Starboard
|
|

Inside Starboard
|
Back side.
|
|
|
Mixed some micro glass spheres (in tall cup) and EZ-Thick Silica (in short cup) and mixed to make what is commonly called "peanut butter". This mix is 50% polyester resin, 25% micro spheres and 25% EZ-Thick. The result is the thick grey stuff with the stirring stick in it. Using Bondo brand polyester fiberglass resin for the window frames rather than epoxy. It will make the final fairing easier.
|

Make Filler
|
|

Filled Gaps
|
Filled gaps where pieces fit together and some chips in the top veneer from the circular saw.
|
|
|
With a complex shaped piece like these windshield frames, its easier and the results are better than trying to do it all with one big piece. Here a piece of 8 oz glass has been cut for the front side, and the right side and rear sides are covered with glass and resin, and the left side is bare.
|
Laying Fiberglass
|
|
Modification for Wipers
|
Forgot to add the corner piece where the wiper motor mounts. Ground off some fiberglass to expose the bare plywood. Then epoxied in the wiper motor mount.
|
|
|
The hole for the wiper shaft was over drilled, filled with resin, then drilled to the correct size. If any water leaks past the seal, it won't be able to soak into the window frame and start the dreaded rot.
|
Wiper Mount
|
|
Getting Closer to Done
|
The top frame has been sanded very smooth. There are just a few areas that need some spot putty and then its hand sanding and paint.
|
|
|
Bad spots happen when you don't pay attention. The glass did not take to the plywood, and there was a big air bubble underneath. Had to grind all this surface clean and reapply the glass.
|
Ooops! Bad Spot!
|
|
Almost ready for Primer
|
Done sanding with the power sander, just a little hand sanding needed in the corners and some spot putty and they are ready for primer.
Putting these aside and turning attention to recessing the deck while the weather is still too cool for epoxy work on the top.
|
|
|
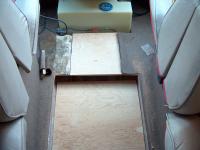
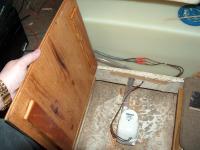
Decided to recess the deck while its still too cool to work with epoxy outside. This is the ski locker, and the new bilge pump facing aft.
|

Ski Locker/Bilge
|
|

Ski locker
|
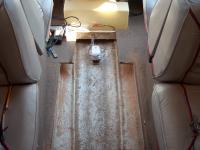
Ski locker facing fore. I want 3 more inches of headroom in the cabin. So the deck will be cut back against the stringers, and brought forward about 10 inches.
|
|
|
The deck is cut back to the stringers, widening the area to 23 inches. The bilge pump will be covered with new plywood.
|
Cut Deck
|
|

Cut Deck Fore
|
After cutting the deck and bringing the opening farther forward.
|
|
|
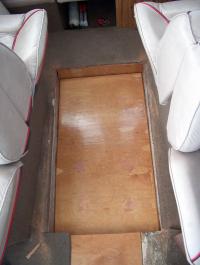
Cut 5/8" CDX and fit into the opening. That leaves about 3 inches of bilge below the deck, and another 3" of headroom in this area.
|
New Recessed Deck
|
|
New Decking Aft
|
Aft view of the new decking. A piece will fill in between the old deck and new recessed deck, like in the photo above.
|
|
|
Here is the Starboard stringer. The plywood decking above will be sanded smooth flush with the stringer. Then the Deco Dot vinyl flooring will wrap over the edge and extend down below the recessed deck.
|
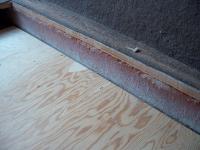
View of Stringer
|
|

Glassing Deck Pieces
|
Glassed the tops of the deck pieces, the sides and back get two coats of resin. Again, Bondo polyester resin is used for the fiberglass work. It does have a fast cure time, so its important to work fast when dealing with larger pieces, or mix smaller batches. I was able to mix and apply about 6 ounces of resin before it starts to 'kick' and become unusable.
|
|
|
The new recessed deck section and the two bulkheads at each end and the small bilge cover. These pieces are all sanded smooth so vinyl deck covering will glue down and be smooth.
|

Glassed and sanded
|
|

Reinforced
|
The deck is 23 inches wide and it was flexing when I walked on it. So another piece of CDX was glued to the bottom using water proof carpenters glue. Screws held the two pieces together until the glue dried, then the screws were removed so there is no chance of rusting. Its all coated in resin on the bottom and sides, and glass/resin on the top.
|
|
Final fitting of the new deck pieces. With the recessed deck reinforced it is solid as a rock. No flexing at all.
Update: To jump to the Vinyl Flooring project where Nautolex Deco Dot is installed, take this link: http://shareaproject.com/pages/projectTut,p,672,00.html
|
Final fitting
|
|
Bilge Pump Cover
|
The bilge pump cover has two cleats added front and rear to keep it from sliding so its secure in place.
|
|
|
Winter has passed, and Spring is here. Warm weather lets me get back to working on the top. Some areas have overlapping 1708 glass and that makes for some large ridges. This is a before fairing shot of a rough spot.
|
Spring Time! Back to the Top
|
|
Fairing Begins
|
Started fairing out the top. First coat is filling in the deepest offsets in the top. 1/16" thick. The fairing is made form glass balloons and silica fibers. Mix is about 1/2 epoxy. 1/6 glass balloons and 2/6 silica. The result is something very much like auto body filler.
|
|
|
Starboard side has first coat and half of the port side is skim coated. Sanding is a problem. This epoxy based fairing is very hard, even the 7" disk sander has a hard time sanding it. Started using 24 grit disks to cut the epoxy!
|

Starboard Side
|
|
First coat on Top
|
There are two seams that needed a primary filling before skim coating the whole top section.
|
|
|
This is the trim and window track to be used on the side windows. The piece on the right is 3/4" quarter round PVC trim that I ripped down to just over 1/2" (the width of the window slide channel). The quarter round will support the window slide channel.
|
Window Track
|
|
Track in Place
|
The quarter round and the track will frame the window openings top, front and bottom. The window will be able to slide all the way out the back, so a rubber stopper will be needed to keep it from being lost when bouncing around on waves.
|
|
|
Set the frames in the top and centered them in the openings.
|
Fitting Windshield Frames
|
|
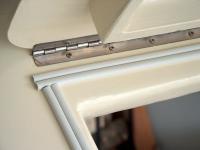
Fitting Hinges
|
Stainless Steel Piano hinge was cut to size and mounted to check window frame clearance and hinge action.
|
|
|
This gives an idea of how much egress there will be through these windows. Access to the bow should be fairly easy, and contorting through the cuddy hatch is no longer needed.
|
Checking Hinge Action
|
|

Window Frames from Inside
|
Window frames come nearly flush to the inside of the top. Simple twist latches will hold them closed.
|
|
|
This is the starboard window frame. Its been sanded using 150 grit, then sprayed with a gray sandable primer, then sanded some more to show the low spots. Red glazing putty was applied and then finish sanded with 220 grit on sanding blocks. Its now ready for paint.
|
Ready for Paint
|
|
Back to Fairing
|
Did as much as could be done using epoxy based fairing. Then started using Marsons Platinum Premium Gold filler. Its a high end body filler that is meant to be used in difficult adhesion situations. This stuff sticks like no body filler I've seen before. After curing, its hard to get off the applicators, your fingers and anything else it gets on.
|
|
|
The whole roof section, front and starboard side are coated with the Marsons. Sanding has started, and its working very well.
|
More Fairing
|
|

More Sanding
|
The Starboard side and the roof are coated in Marsons. This is what it looks like after the initial 80 grit sanding block.
|
|
|
Front
|

And more sanding
|
|
And more sanding
|
Port Side. I think this is the end of the 80/100 grit sanding.
|
|
The glass shop wants a few weeks to get the glass ready, so fairing work is halted while the side window channels are installed so window templates can be made.
This photo shows the PVC trim screwed in place and a piece of window track is laying on the bottom trim.
|

Working on Sliding windows
|
|
Glass Template
|
Cut this cardboard glass template. Its just about 1/8 inch shorter than the distance between the tracks. Nice snug fit. Hope the glass doesn't rattle.
|
|
|
The Starboard side was much quicker to do than the Port. The Port side was disassembled and the pieces used as templates to cut the starboard side pieces. Then they were assembled on the starboard side, and the same glass template is used to ensure that both window tracks are identical.
|
Starboard Side Track
|
|
Window travel
|
This is as far as the window can slide before it starts sticking out the back side of the top. Not sure yet if I'll make it so it can open another two or three inches or not.
|
|
|
Enough with the sanding.... On to primer. Vacuumed the top with the shop vac, then went over with a tack cloth. Used Interlux Pre Coat Urethane primer and a short nap roller.
|
Primer
|
|
Primer
|
|
|
|
|
Window Frame in Primer
|
|
Problems...
|
Have a couple of problems. First, the color coat doesn't match the Capri's gel coat as closely as I would like. Second, I painted the window frame without first sanding the primer, and it has a finish that looks like latex paint put on with a roller. So then I sanded the primer in the area next to the window, and gave it a coat of paint. Better, but have to do a better job sanding or the bumpy look comes through. So its back to sanding.
|
|
|
Re-sanded the whole top from 100 grit down to 220. Then applied the first coat with a foam roller and foam brush using the "roll and tip" method.
|

First Coat
|
|

First Coat
|
|
|
|
|

Full View
|
|

|
|
|
|
The nose section came out much better than I expected.
|

The Nose
|
|

The tools and paint.
|
The paint, and foam roller and foam brush used to paint.
|
|
|
To get the wiper motors to work in the location I want to mount them, the torque arm had to be reversed, and bent to offset the motor a 1/4". The motor on the right is modified, the one one the left is out of the box.
|

Modify Wiper Motors
|
|
Wiper Motor Mounted
|
The motors were mounted, then the windshield frames mounted, then the electric connection between the top and the windshield frames were made from stainless steel sheet metal and installed. One for + and one for - to complete the circuit.
|
|
|
When the window is closed, the contacts are closed and the wipers can work. This design prevents excess wire from hanging down to allow the window to open.
|
Wiper Motor Electric Connection
|
|
Window Frames
|
Window frames with the wiper arms mounted. No glass yet.
|
|
|
|

Just waiting for Glass
|
|

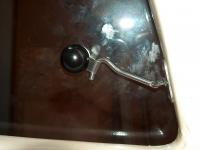
Glass!
|
The tempered glass has an etched mark with the ANSI standards it meets.
|
|
|
Port side window installed. The window channel is epoxied to the trim around the window opening. Thats my 5 year old son being a helper.
|
Port Side Window
|
|

Starboard Side Window
|
Starboard side went in with out any problems.
|
|
|
The support for the windshield glass was made from PVC board. Ripped 1/2" wide strips off of a 1x4 PVC board. Then routered the back side over so it looks nice from inside and no sharp corners. Attached with 3M 4200 and stainless screws
|

Windshield glass supports
|
|
Windsheild
|
Can't install the windshield glass because the part store didn't have windshield adhesive. Ordered some should be here in a couple of days.
|
|
|
The windshield windows are going to be trimmed with the black vinyl T molding. It came in a roll and I cut the lengths needed then warmed with a hair dryer to straighten them out.
|
Winsheild trim
|
|
T Molding
|
Close up of T molding
|
|
|
I realized it would be easier to cut and trim the T molding before installing the glass because the glass adhesive will be holding the T molding in place. Removing to trim would be messy.
|
Installing T Molding
|
|
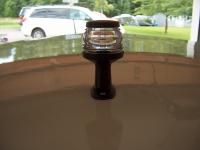
All Around Light
|
Coast Guard regulations require an Anchor light. Has to be the highest point of the boat.
|
|
|
Found this nice double "D" hollow seal to seal the windshields.
|
Weather Seal
|
|
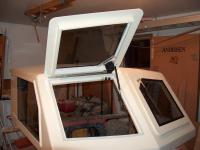
Windshields
|
Starting to look finished. Glass is in windshield frames, wiper motors are mounted and weather seals installed.
|
|
|
Added these side window latches. They will keep the window from accidentally opening while being trailered. Will also come in handy in rough water. Again, all stainless steel marine grade hardware is used.
|
Side Window Latch
|
|
Windshield Springs
|
Installed the Whitecap gas springs to hold the windshield open. Used a 20 pound force spring, but the windshield will fall closed after a few minutes. Not nearly strong enough for bouncing around on the water. Will have to upgrade to 30 or 40 lbs.
|
|
|
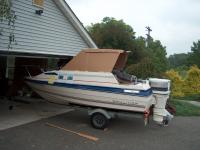
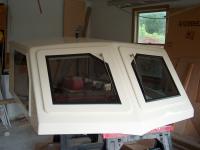
Finally put the top on the Capri. Its taken a while, but now the details can be finished.
|
Top is On!
|
|
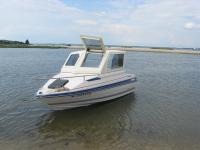
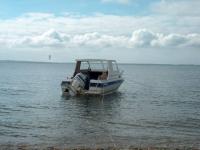
Sea Trials
|
The opening windshield is great! Big so its easy to climb through to do anchor duty.
|
|
|
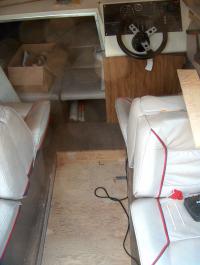
The space is nice. Lots of room to move around (for a 16 foot boat) and its nice to have the protection from the wind while under way. Side windows let in plenty of breeze while at speeds.
|

Roomy and Comfortable
|
|
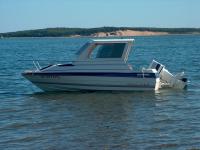
Good proportions and lines
|
The top didn't impact the handling of the Capri that I could tell. In fact, wind did not seem to push it around as much as it did with the Navy top up. Maybe this is more streamlined. Didn't get to do a top speed test because we were always fully loaded. Will wait until there are only one or two passengers to run WOT. It really does look nice sitting on the water. The proportions and lines of the top work well with the original hull.
|
|
|
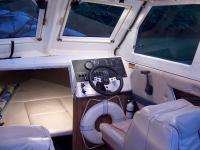
Added two power outlets (for cell phone chargers, portable spots lights, etc) to the left of the wheel. These are !00% stainless steel so they will not corrode in the salt air. Also added three fuse holders just above the ignition switch to fuse the windshield wipers, interior lights, and power outlets.
|
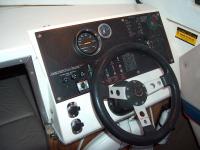
Dash mods
|
|
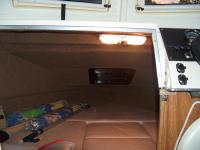
Interior Lighting
|
Added a double dome light to the cuddy. It really lights up the whole cuddy interior very well.
|
|
|
This ball light shines down on the helm. Going to replace the bulb with a red one for reading charts at night while under way.
|
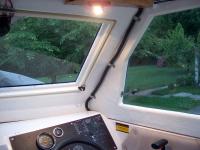
Helm Light
|
|

Cabin Lights
|
Added one cabin light to each side of the hard top. Really lights up the cabin well.
|
|
|
Replaced the rusted and broken stereo speakers with these inexpensive PYRAMID MDC7 6.5" round speakers marine grade speakers. They have plastic grills, plastic cones, and plastic frames so they will not be damaged by water or salt air. UPDATE: after the first few times out on the water, it became obvious the screws were not stainless, and started to rust. Will change out w/stainless screws in spring. For being marine grade speakers, they should have come with stainless screws. Otherwise, the sound great and take getting wet fine.
|
New Marine Speakers
|
|
Lit up at Night
|
Cuddy and Helm light. Put hanger for the throwable PDF ring right under the steering wheel. Very convenient in an emergency. Need to add about 100 ft of 1/4" nylon safety line too. Can't be messing around with anchor line in an emergency when someone's life is in danger. 1/4" is more than enough to haul someone in.
|
|
The lighting keeps the whole cabin brightly lit for those times we are just anchored in the bay watching the sun go down. Feels like a camper inside.
More to come! Headliner for hardtop, new Johnson outboard and other upgrades!
|

All lit up
|
|