|
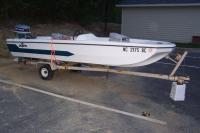
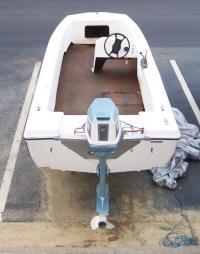
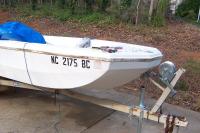
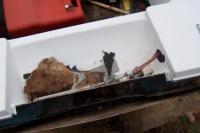
1981 Supra with 35hp Evinrude
|
How she looked when I first got her
|
|
|
|
2
|
|
3
|
|
|
|
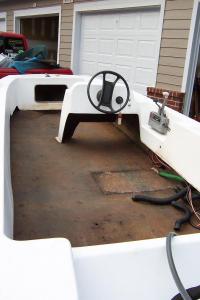
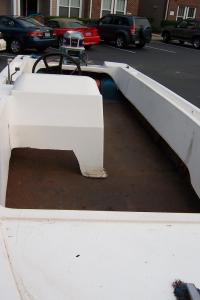
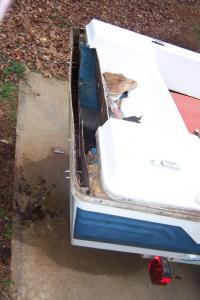
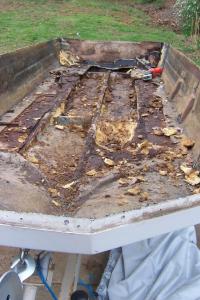
I ripped the carpet out and found that the floor was solid except where the pedestal seats had been. I cut the soft section on the back deck, and found that the stringers are still rock solid but the foam is wet. Since I'm building raised casting decks, I'm debating what to do with the current floor- either patch it, or rip it out.
|
Pics with carpet ripped out
|
|
2
|
|
|
|
|
3
|
|
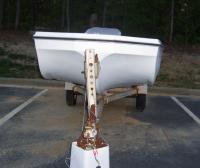
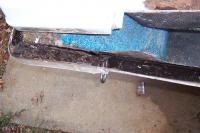
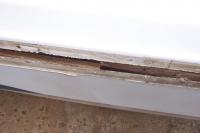
Boat with motor off
|
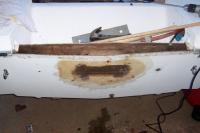
You can see that the transom doesn't look good.
|
|
|
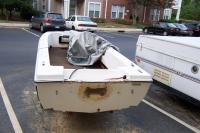
Another shot of the bad transom, and the previous owner's ingenuity :-) This was screwed into the transom to support the motor.
|
Stop!
|
|
Transom cap cut off
|
Most of the wood was mush, it was really easy to get out. The last 15% is going to be harder. Spade bits seem to work well.
|
|
|
|

Transom cap cut off (top view)
|
|

Transom, another view
|
|
|
|
Definitely a "shoe box" type cap.
|
Rub rail off
|
|
Transom inside view
|
|
|
|
I was able to get the cap loose without any trouble at all, and move it forward a little bit to examine things.
|
Cap detached
|
|
Transom corner with cap detached
|
Showing the inside skin of the transom, and the little bit of rotted transom wood left to remove.
|
|
|
Good view of the transom inner skin. I have ripped away part of the inside skin. I am hoping that The outside transom skin will conform to the new transom if properly clamped. You can see in the pic that it is bowed out somewhat at the top.
|
Transom top view with cap moved forward
|
|
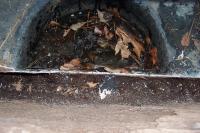
Close-up of bilge area
|
Close up of bilge area with much of inside skin ripped away. I need to determine if I have to cut into the bilge area so I can re-support the transom from the inside, or if I can do it some other way.
|
|
|
Shows bilge area from the inside.
|
View of bilge from inside boat
|
|
Transom top view
|
Another transom pic with the cap moved forward.
|
|
|
This is the starboard side lip, showing the inside ledge of the hull with the strip of plywood that goes around for the purpose of attaching the rub rail. I think I will need to replace this plywood, it isn't rotten but some of the filler is missing and I might as well.
|
Cap detached showing inside plywood
|
|
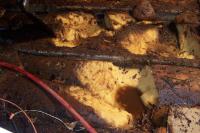
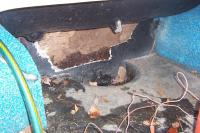
Wet foam
|
I couldn't be happier that we decided to rip out the whole floor. Some of the floor wasn't rotten, but ALL of the foam is totally soaked, with puddles of water sitting in the empty spaces. This pic is in the rear center of the boat.
|
|
|
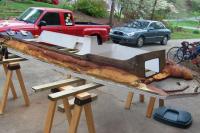
Not too much trouble removing the cap, we flipped it over and put it on sawhorses. I've since covered it, bungeed it to the 2x4s, and screwed the 2x4s into the sawhorses, in case of wind (have to keep it outside).
|
Cap off
|
|
Hull with cap off
|
We removed A LOT of floor and foam today. Decided to cut all the way back to the bilge area, and I am VERY GLAD. There was 4 or 5 inches of water on either side, at the very back behind a rib that kept the water from being seen.
|
|