|
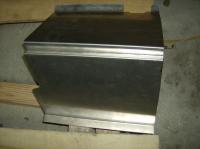
Starting point
|
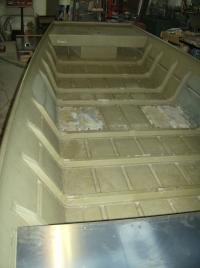
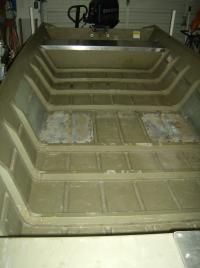
The boat had a basic, open layout. It appears to have had a factory split bench seat, which had been removed previously, and the holes filled with steel machine screws, which had corroded. These were removed, and replaced with solid rivets.
|
|
|
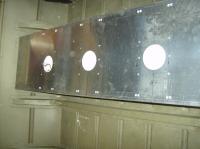
The aft bench seat on this rig was made from .063 aluminum, and what gave it the rigidity from the factory was the flotation foam inside. However, the foam had settled in the years the boat had been used, so the seat had a significant sag in the middle. Furthermore, multiple seat bases had been installed (and poorly so), leaving a swiss cheesed surface. Therefore, I braked a set of flanges in a piece of sheet aluminum, and covered the seat with it, which gave it rigidity, and a clean surface.
|
Aft bench
|
|
Stern bench
|
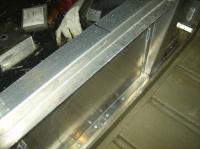
Aluminum bars were installed underneath the bench, which were tapped for seat bases. Holes were drilled to accommodate the bases.
|
|
|
Customer wanted 3 seat bases back here. The outer two will seat two people while running the outboard, and the center one will be used with a pedestal, while fishing.
|
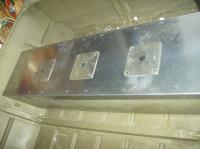
Seat bases installed
|
|
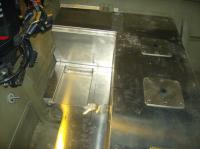
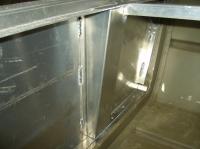
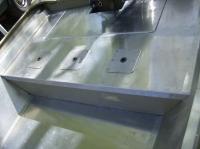
Stern 'pod'
|
The next step was to deck in the area between the stern bench and the transom. These pods are merely brake bent aluminum sheet, which connect to the boats ribs and to the side of the hull. It provides a lip for the center hatch to land on.
|
|
|
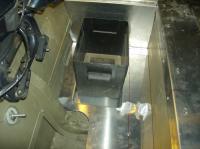
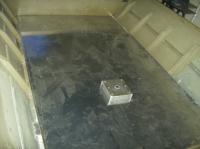
Inside the aforementioned hatch, a floor was needed. As the hatch didn't have much depth, the battery needed to be dropped down a hair, where it would fit in between the boats factory ribs. The cutout is to access the drain plug, and install a bilge pump, if the owner ever desires.
|

Hatch floor
|
|
All put together
|
Here you can see the side pod as well as the floor set into place.
|
|
|
Will hold any size marine battery box. The shown box is for a group 24 battery, but there is enough room to accommodate a group 27 or 31.
|
Battery tray
|
|
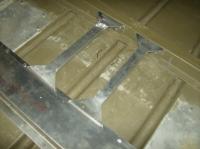
New rib
|
Where the factory bench seats apparently once were, a new rib was definitely needed, as the deck would need support, and the boat was starting to develop a slight camber in this area. A little brake work, and we suddenly have a new floor rib, which is actually a bit stronger than the smaller factory ribs.
|
|
|
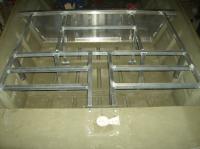
The owner wanted a seat in the middle of the lower deck. These simple flanged 1/2" thick bars will give us adequate metal to thread for the seat base mounting bolts.
|
Structure for pedestal seat
|
|
Lower deck
|
Lower deck installed. The seat base needs more depth than the thickness of the boat ribs, and owner preferred raising just the base, as opposed to the entire lower deck. He plans on keeping a seat in place at all times, which will virtually eliminate the trip hazard the base imposes.
|
|
|
Bow deck structure. The factory bow deck had the same rigidity problem as did the stern deck. Therefore, the new bow deck is going to have a new piece of aluminum cover the existing bow deck, as well as the new deck structure. The seat will be moved aft a few inches, and one of my trolling motor pedal trays installed.
|
Bow deck structure
|
|
Back panel of bow deck
|
The back of the bow deck was made entirely out of formed sheet, instead of using extrusions. The flange to support the hatches was formed out of the same sheet, creating a very clean appearance, all with very little labor time involved.
|
|
|
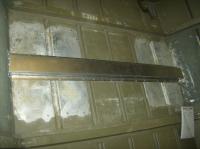
A little more brake work here. These tapered hat sections were used to provide a little stiffness. As thinner aluminum can be used, these are both lighter and cheaper than using extrusions,
|
Hat sections
|
|
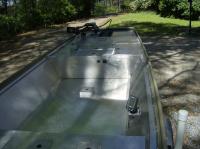
Finished boat
|
At this point, we are going to shift over to finished pictures of the boat, as I either didn't take pictures in the later progress, or somehow lost them. If I ever find them, I'll update the post.
This shot shows the forward portion of the boat. You can clearly see the side panels, as well as the sonar mount.
|
|
|
Here we have a shot of the bow hatches. The two outer hatches are storage, with the center two being a livewell and a battery hatch for the trolling motor battery. The fuse panel and switches are mounted within this hatch.
|
Bow deck
|
|
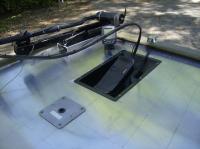
Trolling motor, sonar, and pedal tray
|
I do fabricate and sell these trolling motor pedal trays. They are TIG welded, 5052 marine aluminum, professionally powder coated. If interested, email me at dmion (at) comcast (dot) net.
|
|
|
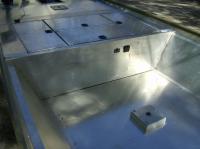
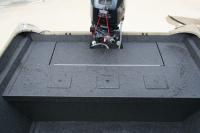
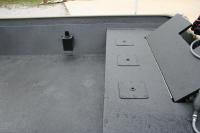
Here you can see the stern deck, and hatch.
|
Stern deck
|
|
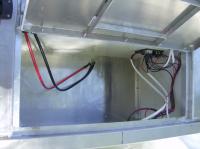
Forward battery hatch
|
All wiring in this rig is tinned marine grade copper wire, and all connections are completed with heat shrink, to ensure trouble free service.
|
|
|
This is merely a cooler built into the deck. As the owner primarily will be using the livewell for taking a few panfish home to the frying pan, and not tournament bass fishing, this 48 qt cooler is more than adequate.
|
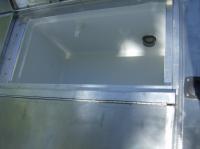
Livewell
|
|
Line-X
|
Customer sent me a couple pictures of the boat after he got it back from the Line-X dealer.
|
|
Here is another angle of the back deck. Looks like there might be water on the deck in these shots.
|
Another angle
|
|