|
The starting point.
|
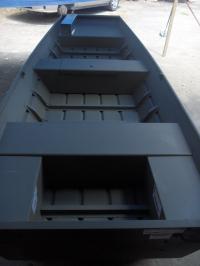
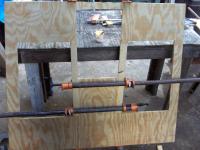
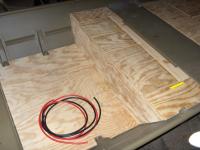
Here is the hull, the day it was brought to me. The owner purchased the trolling motor mount along with the boat. It is resting in place, unmounted, in this picture.
|
|
|
The boat has a livewell in the middle bench. However, it is too small to be practical for a 5 bass limit, so he plans on plugging it, and using it for storage, and using a livewell made from a larger insulated cooler, during bass tournaments.
|
Another view.
|
|
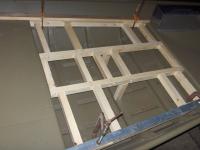
Bow deck structure.
|
Here is the structure for the bow deck. In this picture, it is merely clamped to the board and piece of aluminum, just to get correct spacing for deck measurements. Along with the two legs visible in this photo, there will be two more support legs - one on each outer longitudinal board, attached to the vertical rib up the side of the hull.
|
|
|
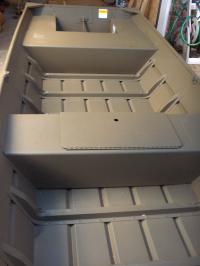
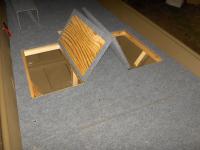
The area in front of the middle bench did not have enough depth for a deep cycle trolling battery, so he opted for a hatch behind the middle bench. I have placed a battery box in one side to show how they fit inside.
|
Battery hatch Structure.
|
|
Bow deck.
|
I have the bow deck cut out. Notice the two pieces of lumber on the inside of each hatch, that are clamped in place. Because the hole on each side is a hatch, I needed a sturdy piece to mount hinges to. Screwing the hinge into the edge of a piece of plywood obviously would not last a while. So, my solution was to biscuit in a piece of quartersawn lumber at each hinge point. More on the biscuit process later. The thing with quartersawn lumber is that the grain is perfectly straight up and down in the board. Thus, when the screw is driven in, it is driven exactly 90 degrees through the wood grain, going through as many grain rings as possible. This provides the absolute maximum screw holding power a board contains.
|
|
|
In woodworking, a biscuit is merely an oval shaped plug of wood, that is used to join two pieces of wood in an incredibly strong joint. Using a biscuit jointer, I cut a series of notches in each board, then on the corresponding point on whatever piece I am attaching it to. This picture shows a notch for a #10 biscuit.
|
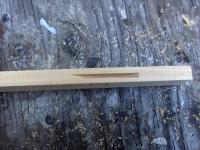
Notch cut for biscuit.
|
|
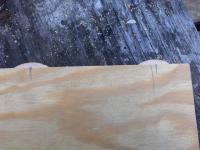
Biscuits in notch.
|
Here are two biscuits in the notches I made in the plywood of one of the hatch lids.
|
|
|
The board on the right is now biscuited and glued to the plywood. Even pressure from the 3 pipe clamps ensures a solid connection. (Triangle on left is just a spacer, given that the hatch is somewhat trapezoidal). In all the times I have stress tested a biscuited then glued joint, I have found the surrounding wood to break before the joint does.
|

Hatch lid drying.
|
|
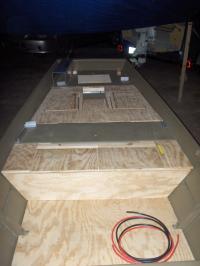
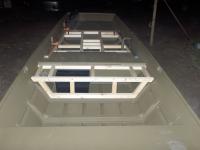
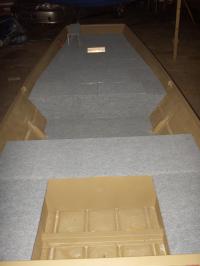
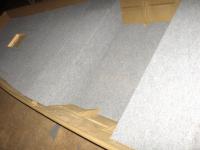
All decking and paneling cut out.
|
All the decking and paneling is cut out, and layed in place. All gappage is intentional, as I will be wrapping the carpet around all the deck pieces, and hatch lids. At the time of this photo, none is attached in place, as I will waterseal all the pieces before final assembly. Because they are merely laying in place, and not fastened, some are slightly crooked, or misaligned. If the humidity here in Georgia will ever cooperate, I will be able to apply the water sealer. At the current date, it is not cooperating.
The hole without a lid filling it up near the bow is where the trolling motor foot pedal well will be, once I finish fabricating it. The wire in the picture is what will be run for the bow trolling motor.
|
|
|
If one picture of the decking laid in place isn't enough, here's another. Notice again, I have biscuited on a piece of quartersawn lumber to the hatch, and have attached a matching piece to the deck structure, for the hinge to be attached to.
|
Another photo of decking.
|
|
Deck carpeted and installed.
|
Here is a shot of the boat nearly in completion. Obviously, I have not yet fabricated/installed the well for the trolling motor foot pedal, as noted by the large gaping hole in the bow.
|
|
|
Here is a shot of the lower portion of the deck, between the battery hatch and stern bench, as well as the paneling, decking, and lids around the battery hatch. Carpet attached to the aluminum was glued to the metal with Henry 663 carpet adhesive, available at Lowes. The carpet is a rubber backed indoor/outdoor carpet, cut by the foot at Lowes. Carpet attached to the wood was wrapped and stapled with Monel Staples, for corrosion resistance.
|
Another shot.
|
|
Factory livewell.
|
The owner of this boat is more than likely going to plug the fill tube, and use this livewell for storage. I carpeted the lid, as well as carpeted around the opening. The gap is there for the lip of the lid to drop into.
|
|
|
Here is a shot of the bow hatches, with lids open. The owner wanted to keep it relatively simple with this rig, so no hatch linings were desired. There is ample room underneath this deck for storage of everything from rain suits to tackle trays.
|
Bow hatches.
|
|
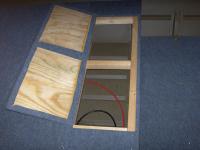
Battery hatches.
|
Here we have a shot of the double battery hatch, fitted just aft of the middle bench seat. This will hold the two batteries needed to power the bow trolling motor, sonar, livewell, and any other accessories that are later desired. The two batteries needed for the 24 volt transom mount motor will be set behind the aft bench seat. The two wires seen are 4 gauge wires for the bow trolling motor.
|
|
|
Here we have the seat base, as well as both the trolling motor foot pedal well, and the hatch pull for the starboard hatch installed.
|
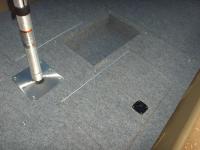
Seat base and trolling motor foot pedal well
|
|
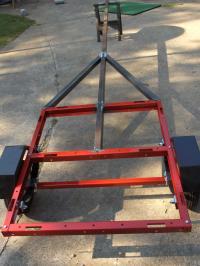
Trailer.
|
Finding a used jon boat trailer in Georgia is next to impossible. Either they are the biggest hunks of junk, or they come with a boat attached. Also, the Northern Tool and Harbor Fright Boat trailers are not adequate, as while they supposedly fit a 14 foot boat, the trailer itself isn't even 13 feet long. The boat would be hanging off the back, and that usually results in a "hook" in the hull.
So, the owner opted for me to make a trailer to fit his hull better. But, buying a Northern Tool 40 x 48 inch trailer is cheaper than just buying the axle, springs, hubs, wheels etc. So, we opted to modify one of those, as the width works real well for a jon boat with a 36" bottom.
|
|
|
I added a much longer tongue, out of 2 x 3 steel, as well as two diagonals out of 2 x 2, which give the whole trailer much more rigidity than would the square alone, not to mention give a better finished look, and allow the bunks to extend further forward. I will be using the tongue that came with the trailer to make the winch post out of. Completed pics of trailer coming soon!
|
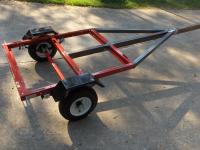
Trailer.
|
|
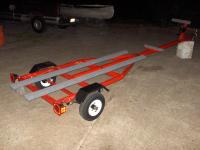
Completed Trailer.
|
Here is the trailer, complete with paint on all the new steel, bunks, lights, winch post etc.
|
|
|
Here we have the boat on the trailer, awaiting pickup by the owner.
|

Completed boat on the trailer.
|
|