|
(Insert New Caption)
|
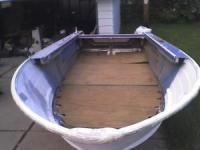
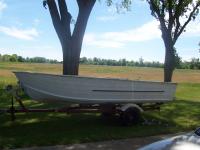
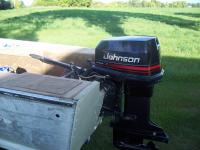
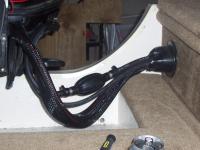
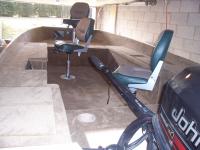
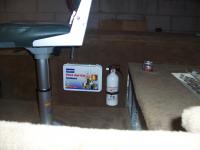
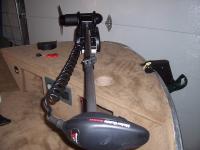
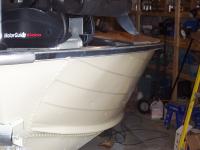
06/10/06. this is what i just bought.
|
|
|
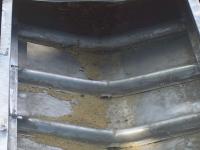
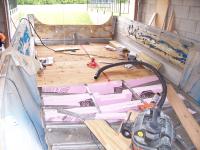
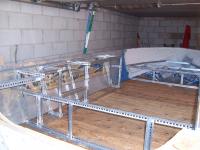
06/10/06. picture of inside hull with plywood removed.
|
(Insert New Caption)
|
|
(Insert New Caption)
|
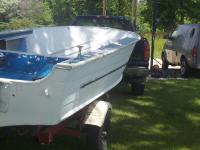
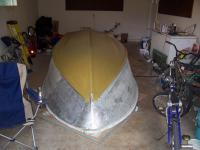
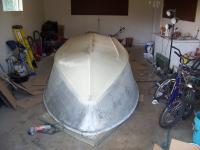
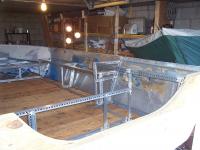
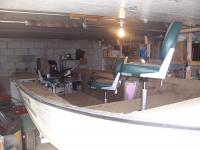
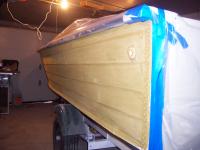
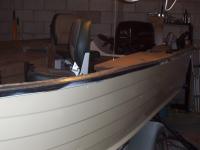
06/10/06. the beginning.
|
|
|
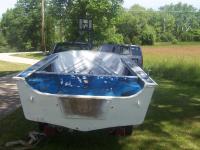
06/10/06. the beginning.
|
(Insert New Caption)
|
|
(Insert New Caption)
|
06/10/06. the beginning.
|
|
|
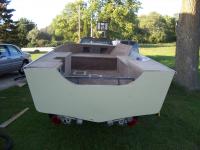
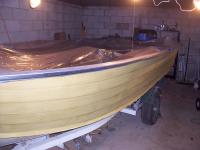
06/24/06. bottom primed.
|
(Insert New Caption)
|
|
(Insert New Caption)
|
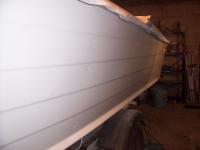
06/25/06. fresh coat of paint on the bottom.
|
|
|
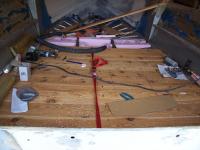
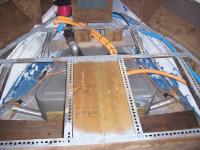
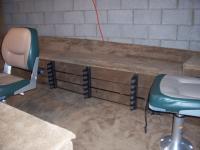
07/02/06. New floor going in. In order to keep it light as possible I am using 1x6 cedar. It cost me $35.00 extra to do it in cedar instead of pressure treated marine plywood but I saved right at 80 pounds in the floor alone. It is solid as a rock.
|
(Insert New Caption)
|
|
(Insert New Caption)
|
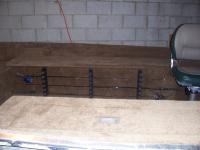
07/02/06. another pic of floor install
|
|
|
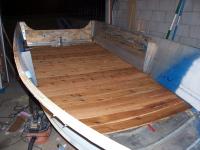
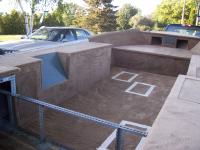
07/03/06. The floor is done.
|

(Insert New Caption)
|
|
(Insert New Caption)
|
07/03/06. the floor is done
|
|
|
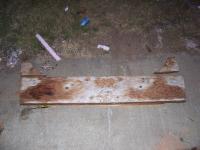
07/03/06. Here's the old Transom. It's pretty waterlogged. It will be replaced and the splashwell will be made smaller.
|
(Insert New Caption)
|
|

(Insert New Caption)
|
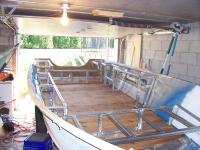
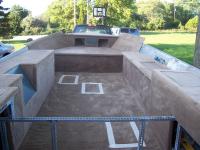
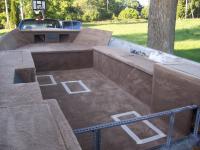
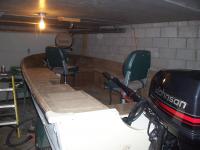
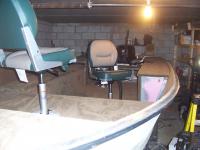
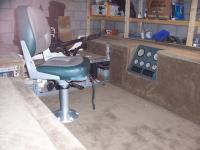
07/23/06. I am almost done framing the interior.
|
|
|
07/23/06. Another pic of the almost done interior framing.
|
(Insert New Caption)
|
|
(Insert New Caption)
|
07/23/06.
|
|
|
07/23/06.
|
(Insert New Caption)
|
|
(Insert New Caption)
|
08/31/06. Picture of newly shaped transom. Everything is just put in place to check fit and tomorrow goes in for a weight check. It weighed 670 pounds. thats 55 pounds less than it weighed from the factory. when complete it should be right on.
|
|
|
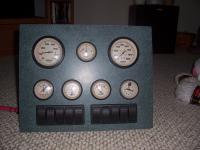
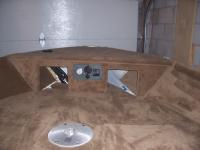
08/31/06. Picture of guage, control panel. Everything is just put in place to check fit and tomorrow goes in for a weight check. It weighed 670 pounds. thats 55 pounds less than it weighed from the factory. when complete it should be right on.
|
(Insert New Caption)
|
|
(Insert New Caption)
|
08/31/06. Another pic of interior. Everything is just put in place to check fit and tomorrow goes in for a weight check. It weighed 670 pounds. thats 55 pounds less than it weighed from the factory. when complete it should be right on.
|
|
|
08/31/06. . Another pic of interior. Everything is just put in place to check fit and tomorrow goes in for a weight check. It weighed 670 pounds. thats 55 pounds less than it weighed from the factory. when complete it should be right on.
|
(Insert New Caption)
|
|
(Insert New Caption)
|
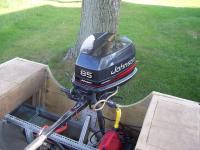
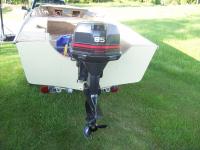
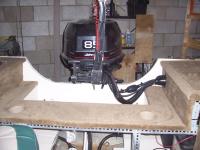
09/01/06. Motor installed. took to lake for test run. small lake at only 52 acres. gps said 44.7 mph. it was still climbing but shore was aproaching rather quickly and I had no tachometer hooked up. so i had to back down.
|
|
|
09/01/06. Motor installed. took to lake for test run. small lake at only 52 acres. gps said 44.7 mph. it was still climbing but shore was aproaching rather quickly and I had no tachometer hooked up. so i had to back down.
|
(Insert New Caption)
|
|
(Insert New Caption)
|
09/01/06. Motor installed. took to lake for test run. small lake at only 52 acres. gps said 44.7 mph. it was still climbing but shore was aproaching rather quickly and I had no tachometer hooked up. so i had to back down.
|
|
|
10/02/06. Due to the larger than planned outboard I decided to install a bow tank to move some weight forward. It was alot of work to get it in there but turned out pretty good.
|
(Insert New Caption)
|
|
(Insert New Caption)
|
10/02/06. Due to the larger than planned outboard I decided to install a bow tank to move some weight forward. It was alot of work to get it in there but turned out pretty good.
|
|
|
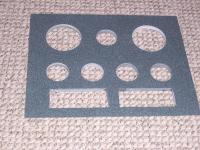
10/30/06. The dash panel is cut out for gauges and switches.
|
(Insert New Caption)
|
|
(Insert New Caption)
|
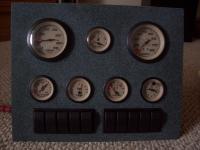
10/30/06. Gauges/switches installed.
|
|
|
10/30/06. Gauges/switches installed.
|
(Insert New Caption)
|
|
(Insert New Caption)
|
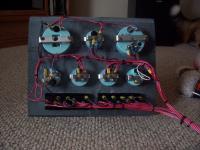
10/30/06. Everything wired and ready to be installed in boat. All the wires will land on either a terminal strip or fuseblock.
|
|
|
12/16/06. pic of bow with front off. you can see fuel fill/ vent hoses and fuel filler installed.
|
(Insert New Caption)
|
|
(Insert New Caption)
|
12/16/06. pic of bow with guage panel set in place. i have some trim work to do on the inside to hide fuel lines and bare spots.
|
|
|
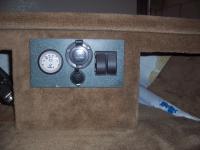
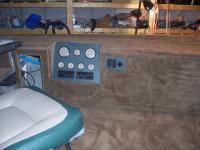
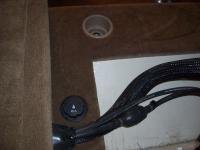
12/16/06. close up of panel. volt gauge, 12 volt outlet, 120 volt charger outlet, switch for front interior lights, and switch for anchor up/down. correct trim pieces for switches on order.
|
(Insert New Caption)
|
|
(Insert New Caption)
|
12/16/06. a fishing boat just has to have a built-in cooler. drain and corner trim on punchlist.
|
|
|
12/16/06. another pic of cooler
|
(Insert New Caption)
|
|
(Insert New Caption)
|
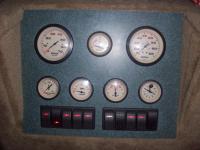
12/16/06. gauge panel set in pace and wired
|
|
|
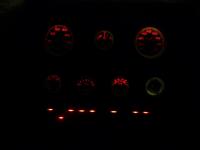
12/16/06. gauge panel lit up. the clock is a matching gauge, but lights up a different color.
|
(Insert New Caption)
|
|
(Insert New Caption)
|
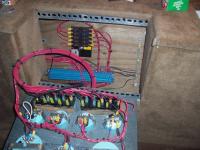
12/16/06. behind gauge panel. fuseblock, terminal srtip, and groundbar. more work to do in here.
|
|
|
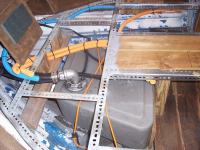
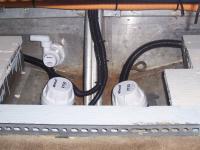
12/16/06. dual independant bilge pumps. livewell pump
|
(Insert New Caption)
|
|
(Insert New Caption)
|
12/16/06. motor rigged
|
|
|
12/16/06. cupholders installed you can see vro tank and starting battery in lower right corner.
|
(Insert New Caption)
|
|
(Insert New Caption)
|
12/16/06.
|
|
|
12/16/06.
|
(Insert New Caption)
|
|
(Insert New Caption)
|
12/16/06.
|
|
|
12/16/06.
|
(Insert New Caption)
|
|
(Insert New Caption)
|
12/16/06.
|
|
|
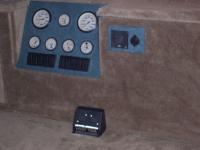
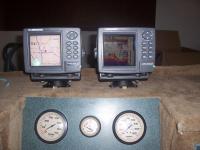
12/17/06. pic of gauge panel. the smaller panel is the ignition key and a 12volt outlet.
|
(Insert New Caption)
|
|

(Insert New Caption)
|
12/17/06. close up of last pic.
|
|
|
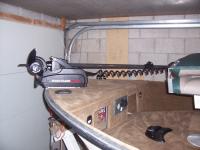
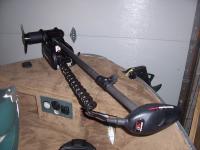
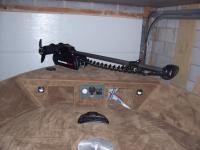
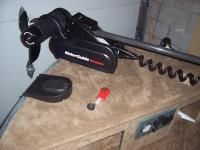
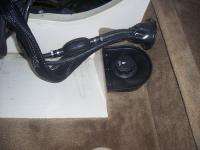
02/04/07. Trolling motor installed. It's a Motorguide W45 wireless model. It has a wireless foot controller and I ordered the key fob.
|
(Insert New Caption)
|
|
(Insert New Caption)
|
02/04/07. Here you can see part of the power anchor. The winch and relays are mounted below the floor under one of the access hatches. It can be raised or lowered from a switch at the bow and a switch in the dash panel.
|
|
|
02/04/07. Pic of the bow. 2 courtesy lights installed. Some odds and ends yet to do here.
|
(Insert New Caption)
|
|
(Insert New Caption)
|
02/04/07. After unsucessfully trying to put a trim switch on the tiller arm that looked and worked good, I decided to go with a foot trim switch.
|
|
|
02/04/07. just in case
|
(Insert New Caption)
|
|
(Insert New Caption)
|
02/11/07. Rod Holders installed.
|
|
|
02/11/07. Another pic of rod holders
|
(Insert New Caption)
|
|
(Insert New Caption)
|
02/11/07. Added splash guard for gas filler and key fob for trolling motor arived.
|
|
|
02/11/07. Cup holder installed.
|
(Insert New Caption)
|
|
(Insert New Caption)
|
03/02/07. Zink Cromate
|
|
|
03/02/07. Zink Cromate
|
(Insert New Caption)
|
|

(Insert New Caption)
|
03/18/07. Coat of primer.
|
|
|
03/18/07. Coat of primer.
|
(Insert New Caption)
|
|
(Insert New Caption)
|
03/21/07. Fresh coat of paint
|
|
|
03/21/07. Fresh coat of paint
|
(Insert New Caption)
|
|
(Insert New Caption)
|
03/21/07. Remote fill for vro tank
|
|
|
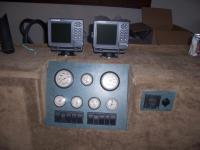
03/29/07. There goes the budget. Lowarnce color GPS and color Sonar.
|
(Insert New Caption)
|
|
(Insert New Caption)
|
03/29/07. There goes the budget. Lowarnce color GPS and color Sonar..
|
|
|
03/29/07.Added a splashguard for the VRO remote fill.
|
(Insert New Caption)
|
|
(Insert New Caption)
|
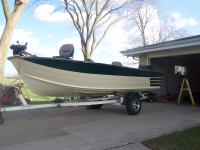
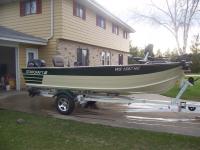
04/28/07. Final paint applied. waiting on decals.
|
|
|
04/28/07. Final paint applied. waiting on decals.
|
(Insert New Caption)
|
|
(Insert New Caption)
|
04/28/07. Final paint applied. waiting on decals.
|
|
|
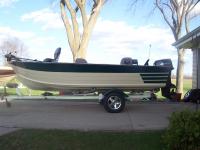
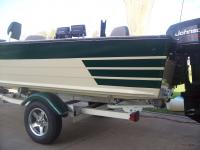
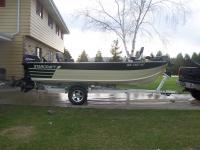
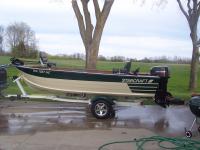
05/06/07. Decals applied. Going in the water this week.
|
(Insert New Caption)
|
|
(Insert New Caption)
|
05/06/07. Decals applied. Going in the water this week.
|
|
|
05/06/07. Decals applied. Going in the water this week.
|
(Insert New Caption)
|
|

(Insert New Caption)
|
(Insert New Description)
|
|
|
(Insert New Description)
|

(Insert New Caption)
|
|

(Insert New Caption)
|
(Insert New Description)
|
|
|
(Insert New Description)
|

(Insert New Caption)
|
|

(Insert New Caption)
|
(Insert New Description)
|
|